Weider 831.153930f Manuel d'utilisateur
Naviguer en ligne ou télécharger Manuel d'utilisateur pour Sports et loisirs Weider 831.153930f. Weider 831.153930f User Manual Manuel d'utilisatio
- Page / 35
- Table des matières
- DEPANNAGE
- MARQUE LIVRES
Résumé du contenu
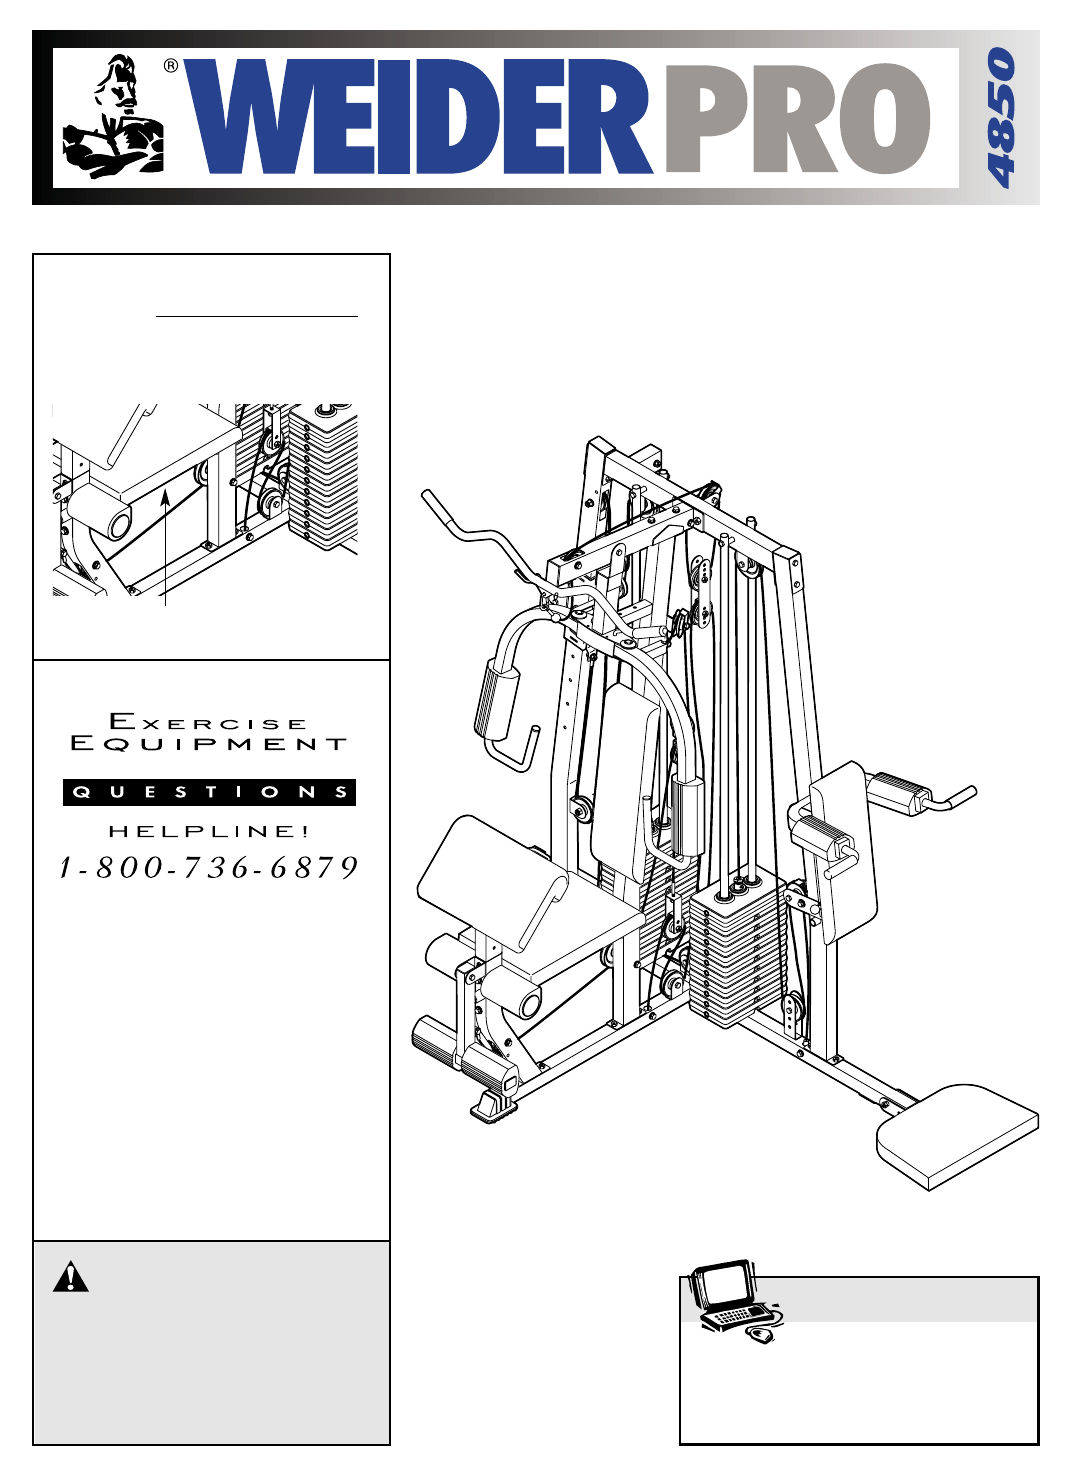
USER'S MANUALVisit our website atwww.weiderfitness.comnew products, prizes,fitness tips, and much more!Patent PendingCAUTIONRead all precautions
1014. Open the parts bag labeled “ARM ASSEMBLY.”Press three 1 1/2” x 2” Inner Caps (21) into the LegLever (10). Attach the Eyebolt (116) to the LegLev
18.Locate and open the parts bags labeled “CABLEASSEMBLY” and “PULLEYS.”Lubricate the 3/8” x 7” Bolt (30) with grease. Attachthe Swivel Cage (76) to t
1220. Remove the preattached 3 1/2” Pulleys (78) fromthe Small Pulley Plates (31).Wrap the Swivel High Cable (74) over a 3 1/2”Pulley (78). Attach the
1324. Remove the preattached 3 1/2” Pulleys (78) fromthe Offset Double “U”-bracket (61).Wrap the Swivel Cable (17) around a 3 1/2” Pulley(78). Attach
1429. Wrap the Lat Cable (88) around a 3 1/2” Pulley(78). Attach the Pulley and a Long Cable Trap (102)to the Top Frame (6) with a 3/8” x 1 3/4” Bolt
153536383734. Remove the preattached 3 1/2” Pulleys (78) fromthe Double “U”-bracket (62).Wrap the Butterfly Cable (69) under a 3 1/2” Pulley(78). Atta
1641. Remove the preattached 3 1/2” Pulley (notshown) from the “U”-bracket (64).Attach the end of the Leg Lever Cable (75) to the“U”-bracket (64) with
1745. Wrap the Swivel Low Cable (72) under a 3 1/2”Pulley (78). Attach the Pulley to the indicated brack-et on the Long Base (120) with a 3/8” x 1 3/4
1849. Wrap the Swivel Low Cable (72) over a 3 1/2”Pulley (78). Attach the Pulley and a Cable Trap (68)between the lower set of holes in the “U”-bracke
1953. Wrap the Squat Cable (73) under a 3 1/2” Pulley(78). Attach the Pulley and a Cable Trap to the sec-ond set of holes from the top in the indicate
2TABLE OF CONTENTSIMPORTANT PRECAUTIONS . . . . . . . . . . . . . . . . . . . . . . . . . . . . . . . . . . . . . . . . . . . . . . . . . . . . . . .
2057. Attach the Seat (16) to the Seat Frame (8) with two1/4” x 3/4” Screws (114), a 1/4” x 2 1/2” Screw (99),and a 1/4” Washer (97).58. Attach the Bu
216161. Unscrew the Adjustment Knob (115) and remove itfrom the Squat Bracket (37). Turn the SquatBackrest (35) so that the four screw holes are clos-
22ADJUSTMENTSThe instructions below describe how each part of the weight system can be adjusted. Refer to the exerciseguide accompanying this manual t
23ADJUSTING THE SQUAT ARM OR SWIVELCARRIAGETo adjust the height of the Squat Arm (32), first turnthe Adjustment Knob (115) on the Squat Bracket (37)co
HIGH PULLEY(lbs.)1425384861688096101112122LOW PULLEY(lbs.)1425364460708091104111122LEGLEVER(lbs.)2235536791111122148160184190BUTTERFLYARM(lbs.)1726364
25TROUBLESHOOTING Make sure all parts are properly tightened each time the weight system is used. Replace any worn parts immedi-ately. The weight sys
26CABLE DIAGRAMSThe cable identification chart below shows the ends of each cable and the lengths of the cables. The cable dia-grams on this page and
27Leg LeverCable (75)Swivel LowCable (72)113245679234123458Swivel Cable (17)
Part No. 190959 R1102A Printed in Canada © 2002 Sears, Roebuck and Co.FULL 90 DAY WARRANTYFor 90 days from the date of purchase, if failure occurs due
Note: Assembly is divided into four stages: 1) frame assembly, 2) armassembly, 3) cable assembly, and 4) seat assembly. The hardware foreach stage is
IMPORTANT PRECAUTIONS31. Read all instructions in this manual and inthe accompanying literature before using theweight system.2. It is the responsibil
1" Round Inner Cap (29)1 1/2" x 2” Inner Cap (21)2" Square Inner Cap (105)1 1/2" Square Inner Cap (67)2" x 3” Inner Cap (58)2
Cable Clip (83)3 1/2" Pulley (78)(Not shown to scale)"V" Pulley (55)(Not shown to scale)4 1/2" Pulley (119)(Not shown to scale)3/8
3/8" x 2" Bolt (100)3/8" x 1 3/4" Bolt (93)3/8" x 1" Bolt (13)#10 x 1" Screw (14)3/8" x 2 1/2" Bolt (18)5
81REMOVE THIS PART LIST/EXPLODED DRAWINGFROM THE MANUAL.SAVE THIS PART LIST/EXPLODED DRAWING FOR FUTURE REFERENCE
PART LIST—Model No. 831.153930 R1102ANote: “#” indicates a non-illustrated part. Specifications are subject to change without notice. 1 2 1/2” Washer2
465732891012161091091919202021212011621232425262727282929283233331111113537383939404040424243434745444544484849505011411452525555565757575854542160606
4BEFORE YOU BEGINASSEMBLED DIMENSIONS: Height: 77 in.Width: 81 in. Length: 59 in. Squat Knee RestCurl PadLow Pulley StationHigh Pulley StationLat BarS
5ASSEMBLYMake sure that you have the following tools:• Two adjustable wrenches• One standard screwdriver• One phillips screwdriver• One rubber mal
1.Locate and open the parts bags labeled “FRAMEASSEMBLY 1” and “FRAME ASSEMBLY 2.”Press a 2” Square Inner Cap (105) into the openend of the Long Base
4. Press a 1 1/2” Square Inner Cap (67) into thesquare tube on the Butterfly Upright (3).Slide the Butterfly Upright (3) onto the two indicated5/16” x
87. Press a 2” x 3” Inner Cap (58) into the top of theSquat Upright (4). Slide the Squat Upright onto thetwo indicated 5/16” x 2 1/2” Carriage Bolts (
99. Attach a Roller (39) and two 5/16” Washers (90)between the indicated set of holes in the SquatSlider (38) with a 5/16” x 3 1/2” Bolt (94), two 5/1
Produits connexes et manuels pour Sports et loisirs Weider 831.153930f
 (33 pages)
© 2020, manymanuals.fr. Tous droits réservés | 3.925 s |
 Manymanuals.com
 Manymanuals.de
 Manymanuals.fr
 Manymanuals.it
 Manymanuals.pl
 Manymanuals.cz
 Manymanuals.es
 Manymanuals-pt.com
Commentaires sur ces manuels